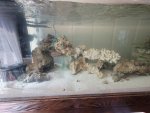
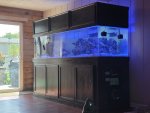
300 gallon financial sinkhole

fishyfish22

Premium member
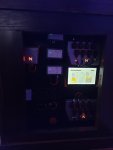
I've never had an APEX before, having finally jumped the gun on a system I decided to find a way to display it.

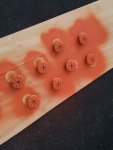
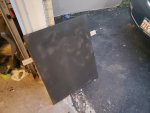
ended up buying plywood and drilling 2" holes and grommets that I spray-painted orange
on top of the black background, I can say they contrasted well. Only change would be to sand the board and spray-paint again to remove the droplets of paint.

The Tablet used is a FIRE HD 10, I didn't like the sizes of the others and read that they had issues running fusion. I'd be happy to include steps on how to run Fusion on it if anyone's interested
5852

5853


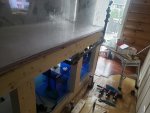
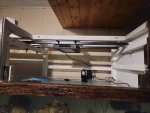
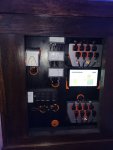
I mounted the panel inside of the stand, so the display ultimately looks like this
58545855

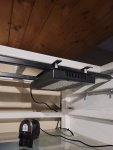
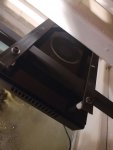
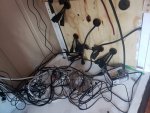
And the back, featuring a little bit of Cable Gore
5856
 

fishyfish22

Premium member
it did just occur to me, that in order to achieve a slicker looking back for the control panel I can get a black acrylic panel, or a black sheet of acrylic and spray paint it black
 

fishyfish22

Premium member
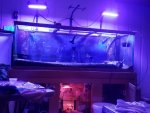
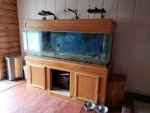
Day finally came to take down the tank. It's always a bit emotional to see a tank you've been running and caring for for the last 8 years empty, but it was exciting knowing what was coming!
5935
5936

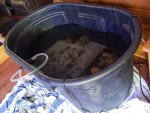
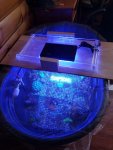
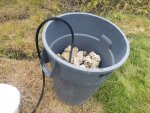
All of the fish went into a 100 gallon Rubbermaid trough, i made a small plywood mount for lighting and it had proper circulation

5937

5938

It was during this time that I had to travel for work. During the process, there was damage with the bubble regulator on my calcium reactor which caused alk to leech into the tank.

Sad to say, but insane alk swing that came from this resulted in the near loss of most of my coral.

The ammonia spike that came from the ammonia spike caused fish to drop one at a time. I came home to find the water cloudy.

As sad as it was to think, I would be moving forward with a blank slate as far as anything with a skeleton and fish.

Zoas appeared to be doing great though, surprisingly enough.

I did lose a few of my favorite pieces. I'm a big fan of old school corals and my absolute favorites being Sunset Montipora and red dragon Acro. These are 100% on my to acquire list.
 

fishyfish22

Premium member
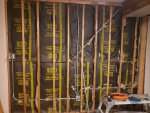
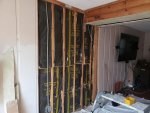
when our house was first made, half of the houses outlets were added to the same circuit breaker. This includes the kitchen, living room, bedroom, and the family room where the tank is.

this means that the circuit breaker would flip about once a week. If we used the microwave, toaster, or vacuumed while the TV was on the breaker would switch and the tank would be out of power. Having the tank out of the way gave us the ability to hook it up to its own circuit breakers, the four outlet panel divided between two of them.

This took an entire day to do, but it was worth every minute now that we can use the microwave without the risk of power going out!
5940

5939
 

fishyfish22

Premium member
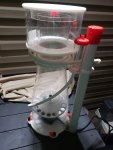
I gave all of the old equipment a citric acid bath, I love how clean everything came out!

I also wanted to start clean. I took all of my rock an gave it double the acid baths. Following this they stayed in a Rubbermaid tub with circulation for a few weeks to let everything seed, I tested the ammonia to make sure everything went appropriately and I was gladly able to start the tank with clean, cycled rock!

5941
5942

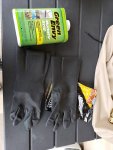
make sure you're safe and use gloves and glasses when dealing with acid! a mask works as well, these are not vapors you want in your lungs.

5943
 

fishyfish22

Premium member
After aqua scaping, Plumbing has to be one of my favorite parts of a reef tank. It's like

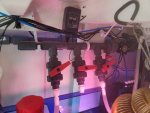
I used the reverse check valve in order to cut the siphon for the pump turning off and keep the sump from leaking

I used this as an instruction, but modified it slightly in order to fit my design.

I installed a manifold in order to preserve pump pressure and space in the sump and so far, I've got no regrets in it.


5944
5945
5946
 

fishyfish22

Premium member
In my previous tank I used painted and bent conduit to mount the radions. This build provided a different challenge, I wanted something that hit all of the following points

  • Ease of Access into the tank
    • I wanted a light setup that allowed me to be able to move around in the tank should I need it, last thing I wanted was to not be able to reach in to glue a frag or get something that fell in the back because of the lights being in the way.
  • Lights around 10 inches from the top of the tank
    • This was mainly for PAR, with the lights I was using the last thing I wanted was to restrict the par getting into the tank
  • Ability to add and move the lights around
    • Because I was starting with two and would gradually be adding more, i didn't want the lights to be fixed. I wanted to move them around when needed. This eliminated the option of hanging the lights, It also meant I couldn't build something sticking out of the wall to hold the lights in a fixed position. I also wanted it to be easily removable in case I needed maintenance or wanted them to be upgraded down the road.
  • Ability for the canopy doors to open and close
    • The lights simply being mounted to the top of the canopy would mean I couldn't open or close the canopy doors. It was another reason T couldn't hang them form the ceiling, as the doors rested on top of the cabinet when opened.
  • Ventilation for the lights
    • This is self explanatory, I needed room for the lights to have ventilation to prevent overheating. This meant the backs would have to be opened/exposed.

In the end, a trip to ACE gave me the idea of a rail mounted inside of the canopy. I used square weldable tube to make the rail and flat bar to attach the Light. Using nuts, bolts, and spacers I was able to affix the holder to the tracks, Everything was double painted to prevent rust and I'm able to add the radions as I choose!

my favorite thing about this design is the ability to slide the lights side to side in a section without having to take the light off completely. In the event that I do need to, a simple allen wrench and care makes this design easily adaptable. In the end it looks really clean as well, which is a huge plus.

5951

5952

5953
 
Last edited:

fishyfish22

Premium member
Nice build. Where did you get your plumbing parts?
I got all of my plumbing from Bulk Reef Supply, I liked the fact that they had absolutely everything I needed, and in schedule 80. It's impossible to find schedule 80, the local Home depot and Ace don't have it and menards only has the basic fittings like connectors and elbows. I drew up a plan, sat on it for 3 days, and then ordered when i knew i wouldn't be making any changes. The only thing I'd recommend overcalculating on is pipe length, but even then measure twice cut once.

I can post the schematic for my manifold if you'd like!
 

((FORDTECH))

Premium member
I got all of my plumbing from Bulk Reef Supply, I liked the fact that they had absolutely everything I needed, and in schedule 80. It's impossible to find schedule 80, the local Home depot and Ace don't have it and menards only has the basic fittings like connectors and elbows. I drew up a plan, sat on it for 3 days, and then ordered when i knew i wouldn't be making any changes. The only thing I'd recommend overcalculating on is pipe length, but even then measure twice cut once.

I can post the schematic for my manifold if you'd like!
Can I ask you why you and everyone else thinks schedule 80 PVC is so important to have I’m just curious?It cost a whole lot extra money and it’s really not necessary besides maybe for the color But maybe I’m missing something. It’s also a lot heavier which will cause more unneeded stress from the weight on the components it mounts to
 

fishyfish22

Premium member
Can I ask you why you and everyone else thinks schedule 80 PVC is so important to have I’m just curious?It cost a whole lot extra money and it’s really not necessary besides maybe for the color But maybe I’m missing something. It’s also a lot heavier which will cause more unneeded stress from the weight on the components it mounts to
Good question! So my reason for going schedule 80 was that I liked the stability that the thicker pipes gave to my build. My previous tank ran schedule 40, and it felt a lot flimsier, it would shake more than the current build does, regardless of how i secured it.

In addition to that, the valves in schedule 80 are significantly better than the schedule 40 ones. I'm thinking of the check valve in particular.
 

fishyfish22

Premium member
It's time to talk about the... stocking list

So here's what I have in mind, I'll obviously add them in waves and qt everything for 6 weeks
Must haves (per family requests):
-Gem tang (fathers favorite)
-Mystery wrasse (father's favorite)
-Desjardini sailfin tang (mothers favorite fish)
-One spot foxface (brothers favorite fish)

Rest of the list
-Pyramid Butterflyfish Trio
-Whitetail bristletooth tang
-Blue Hippo Tang
-Powder Blue Tang
-Achilles tang
-Sohal Tang
-purple tang
-Blonde Naso Tang
-Sargassum triggerfish
-group of rainsford gobies. I kept these in a 60 gallon macroalgae cube I kept a while back, I love watching them dart around and the detail they'll add to a larger tank
-goby/pistol shrimp pair
-mandarin dragonet pair
-starry blenny
-African midas blenny
-clownfish pair. I'm in love with the longfins, but I also liked the black storm pair I had previously

I'm also looking for a schooling fish that swims openly. I'm considering black and white chromis or scissortail dartfish, but I'm leaning towards seven lyretail anthias.
 
Last edited:

Sawdonkey

Premium member
I like that list! A school of dart fish would be cool. Tanks with tons of anthias look great because of all of the movement and color, but you hardly ever see people able to keep large groups of them alive for long periods.
 

fishyfish22

Premium member
thanks! I'm excited about the challenges that come with.
Tanks with tons of anthias look great because of all of the movement and color, but you hardly ever see people able to keep large groups of them alive for long periods.
This is one of my hesitations with anthias, as nice as they are they're difficult longterm alongside chromis (with the exception of the one or two "i've had 6 chromis for 5 years").

Two other options are firefish, and banghaii cardinals but i think i'd prefer something a little more slim that darts.
 

fishyfish22

Premium member
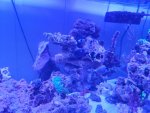
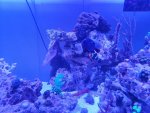
my personal favorite part of any build is the scaping. I like the randomness and creativity i can put into it.

for this build I chose a three island approach. On the right, I would include LPS and zoas, as well as a mushroom garden.

The center Island would be for the more invasive coral, this includes tubinaria, the more invasive zoanthids, bubble tips, and xenia!

On the left, the goal was to run a majority of sps with the occasional odd frag here and there. I made the back steep, with the hope of including the longer gorgonians and montis there.

Overall, I really like how the scape came out. Only thing I would change would be to add more hiding places for fish, but that can always be added.

I used Emarco 400 mortar to hold the rock together as I built it, and I can honestly say the stuff is strong enough to the point that the rock will break before the cement does. One bucket was all I needed for the entire build, and i was a bit generous in some parts than others

5999

Here's some pics of the middle island as stuff was added, you can see the nems were NOT happy. They completely browned out.
60006001

I sadly did not get a picture of the right island while it was empty, but I'll get some as stuff fills in! I like the design because using rocks i built a canyon with caves that the fish can swim around and in.
 
Top