300 gallon financial sinkhole

fishyfish22

Premium member
Hi! some of you recognize me around the forum, some of you have bought or sold coral or equipment from me. Point is, I'm way overdue a tank thread but always hesitated because it had already been set up. I'll be going from a 180 gallon to a 300 gallon acrylic tank, documenting experiences, mistakes, ideas, everything.

I entered the saltwater game when I was a freshman in high school. By a hair of chance, my father and I ended up buying a used 120 gallon reef setup instead of a 100 gallon freshwater tank with cichlids. It was a humble tank and stand, hang on back overflow and thick vho's as lights.

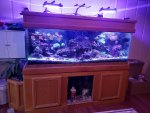
This sparked an addiction. The very next summer we went out and found a used 180 gallon reef ready tank on Craigslist to upgrade to. This tank, the one pictured below, came empty. It lasted us from 2012 to 2020, 8 years strong.
We kept it up until this year, where you join us on the journey to build a 300 gallon tank that hopefully makes the jaw drop!

Heads up, this is going to be picture heavy and I'll try to include details wherever possible


Glossary:

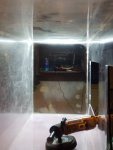
this is my previous tank, it was a 180 gallon reef ready. Set up for about 7 years, in the time it's had it's ups, downs, and lulls. Time to move forward with the new build!

53145315
 
Last edited:

fishyfish22

Premium member
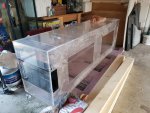
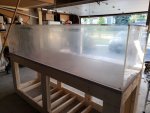
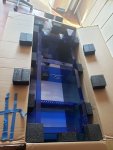
Before the tank even came down, I wanted to have the new tank ready to go. I picked up a used Acrylic tank for a pretty good price, at almost the exact dimensions I wanted.

I originally wanted glass, but a new tank was financially out of the question and there was no one selling a glass tank with the dimensions I wanted for the few months I was looking. In hindsight, I should've gone glass.

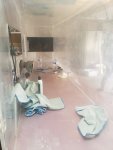
You can see within hours of adding the tank, it had it's first inhabitants. They unfortunately weren't reef safe, so they had to go back to the LFS.

53165317
 

fishyfish22

Premium member
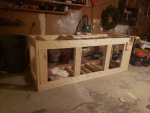
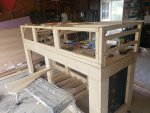
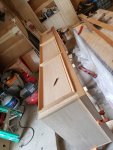
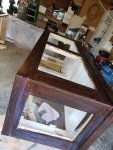
First things first, I needed a stand. I decided the best way to go about it would be building one myself. Made the frame from pine, then layered the outside of it with oak.

some tips for future stand builders:
  • get a kreg pocket hole jig. I was a believer that the kreg jig was overhyped and overused, moving forward i don't think I'd build a piece of furniture without it.
  • Measure twice, cut once. you'll save several trips that way
  • try to have all of the wood cut before assembly, you can make sure they're the same size and relative to how you need them that way
Overall, cutting and building the frame took about a day or two. Installed 7 braces on both the top and bottom in order to prevent twisting.

Feel free to ask any questions, I'll update more as free time progresses

5318
 

fishyfish22

Premium member
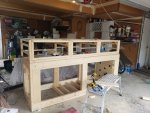
After the stand frame, I started working on the canopy. I had a few things i wanted resolved with the canopy:
  • I wanted lights to be inside of the canopy. My previous tank, the 180 gallon, had the lights coming out of the top. This made being next to it annoying as the light bleed would cause problems
  • I wanted there to be plenty of room in the top for me to have access to the tank, regardless of the side. This was difficult to manage with the previous point, since normally any light in the canopy would become a problem when i tried to work in the tank
  • It needed to be lightweight and easily movable
  • I wanted it to have an open top for gas exchange and so the lights wouldn't overheat
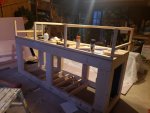
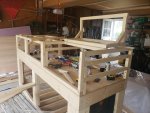
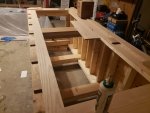
In the end, this is the frame for the canopy that I built. I was fairly proud of it, i used piano joints on the top for the hinges. The design I used allowed for me to open up whichever third of the canopy I wanted without having to open up the other two

5377


5378


5379


5380
 

fishyfish22

Premium member
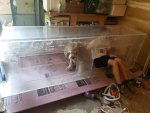
Next step was buffing the tank. I used an orbital palm sander starting from 600 going all the way up to 10k grit sandpaper, it was definitely a long process and I can say I spent several hours at a time inside of the tank. Much soreness followed, i used a handheld polisher to remove the hazing and was able to remove the haziness left over on the acrylic from the haziness.
Note: YOU CAN'T BUFF GLASS TANKS

you can see one of the panels when it was finished, beautifully see through.

5384

5383

5385
 

Sawdonkey

Premium member
Wow lots of work! Well done. Those euro braces and small access hole are going to make that thing a beast to work in. My tank is completely open on the top and I feel like it’s a pain sometimes. I cannot imagine trying to work through those holes.
 

fishyfish22

Premium member
Wow lots of work! Well done. Those euro braces and small access hole are going to make that thing a beast to work in. My tank is completely open on the top and I feel like it’s a pain sometimes. I cannot imagine trying to work through those holes.
It's actually not very difficult to work with, the way i designed the lighting rail gives me plenty of room to work and get in there!
 

fishyfish22

Premium member
Next step with the stand was layering and staining the stand. I wrapped it in 1/2" oak boards, evenly sanded the borders multiple times and stained it a nice dark color to go with the rest of the room. Following this came another light sanding followed by 2 layers of polyethylene with sanding in between.

I painted the inside of the tank and canopy with white KILZ Premium Interior/Exterior Latex primer.

5401
5402

5403
 

fishyfish22

Premium member
Whoops, didn't mean to neglect the thread updates


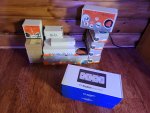
Suppose it's about time I posted an equipment list:

Controller:
As far as the controller goes, I'm using an APEX EL, here's the plan
I'll use 2 EB832s and 2 old school EB8s
2 FMMs, one will be the ATK v2 and one will monitor flow in the calcium reactor, return, manifold, and Emergency overflow
2 additional optic lights
I'll use an B/O Box to control strip lights in the stand. I think using magnetic trips I can get it so that the lights turn on and off with the opening and closing of the doors
so in total
I'll have an individual PH probe to control the calcium reactor and one in the sump for pH
a temp probe in the tank and one in the sump
so in total
1x Base Unit
2xEB832
2x EB8
2xpH probes
2x Temp Probes
1xB/O Box
2xFMM
3x 1" Flow Sensors
1x1/4" Flow Sensor
4x optic Sensors

Flow:
4x Neptune WAVs
RO DC-5500 Return Pump

Filtration:
Skimmer: Bubble Magus Curve 9
Avast Marine Skimmate Locker
TLF Phosban 550- GFO
BRS Dual Reactor- Carbon
Sump: Trigger Systems CR44
Calcium Reactor: CR140
Heaters: Cobalt heater + TruTemp 800W Heater/controller

Lighting:
6x Radion G5s
Basic grow LED for Refugium


As far as lighting goes, i'll be saving up and purchasing the radions periodically.
I honestly would have never imagined getting some of this equipment for a reef tank, but i decided that due to a blessing from work i was able to splurge a little bit, considering I was saving quite a bit by building my own stand and canopy
 
Top