
You are using an out of date browser. It may not display this or other websites correctly.
You should upgrade or use an alternative browser.
You should upgrade or use an alternative browser.
New Here... And Just Started Up My First "Real" Reef Build
- Thread starter Broadfield
- Start date
Broadfield
New member
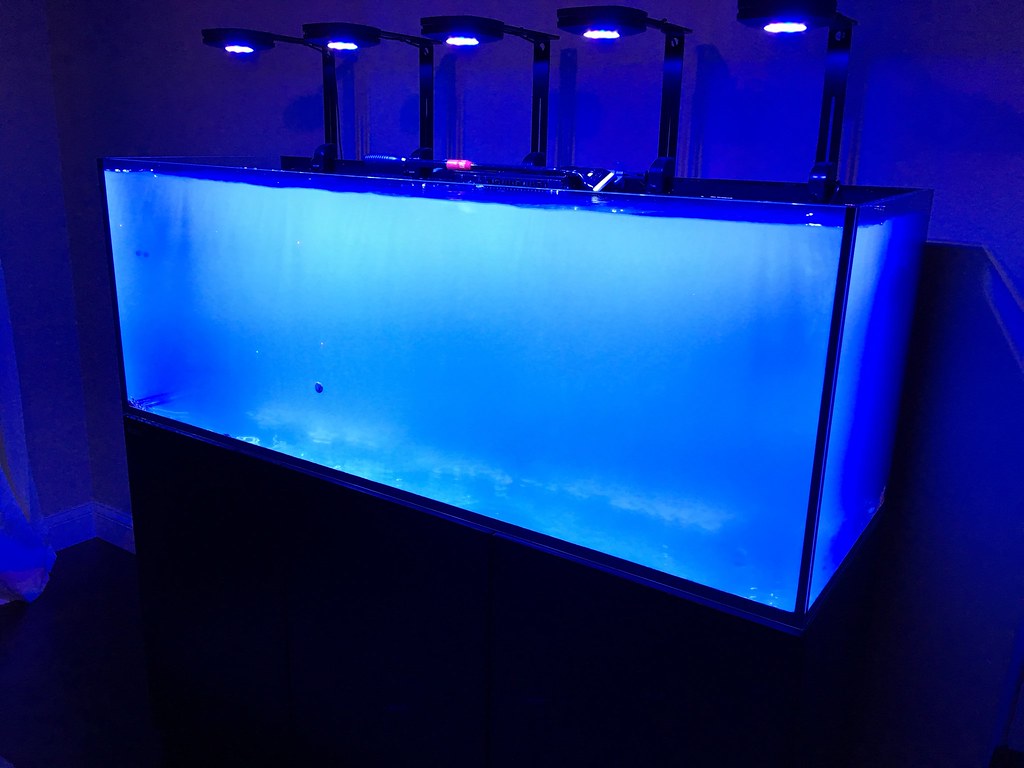
Even though I only had a 30 gallon previous to this setup, I still hated water changes... making RO/DI water, mixing salt in a 5-gallon container, hauling buckets of tank water, hefting 5-gallons of salt water over the edge of the tank etc. My RO/DI was set up under my kitchen sink, that was inconvenient... I'm sure I could think of a few other things to complain and whine about. So now with a larger tank, I took this opportunity to make all of this easier. I purchased two 65-gallon tanks from Farm & Fleet. I was lucky that my local store actually stocks them. The tanks themselves are not extremely expensive. But by the time you factor in freight charge, if you buy online, it gets out-of-hand quickly. I used 3/4" schedule 80 to plumb it all. A bunch of Viton sealed, true union ball valves later, I had an easy way to manage my RO, salt water and do water changes without any buckets or hoses.
 IMG_4021 by Toby Broadfield, on Flickr
 IMG_4019 by Toby Broadfield, on Flickr
 IMG_4022 by Toby Broadfield, on Flickr
So now with a larger tank, I took this opportunity to make all of this easier. I purchased two 65-gallon tanks from Farm & Fleet. I was lucky that my local store actually stocks them. The tanks themselves are not extremely expensive. But by the time you factor in freight charge, if you buy online, it gets out-of-hand quickly. I used 3/4" schedule 80 to plumb it all. A bunch of Viton sealed, true union ball valves later, I had an easy way to manage my RO, salt water and do water changes without any buckets or hoses.IMG_4021 by Toby Broadfield, on FlickrIMG_4019 by Toby Broadfield, on FlickrIMG_4022 by Toby Broadfield, on FlickrBroadfield
New member
Everything looks so professionally. Did you plan everything out yourself?
Yeah, it was my first time doing a setup like this... I've only had a couple of AIO nano setups in the past. However, I'm a jack-of-all-trades type of person. I do a lot of artistic/design/fabrication with my hands for a living... so I was confident that this would be a pretty easy task.
Broadfield
New member
Well, it's been a little over a year since my last post. I completely forgot that I joined this forum... FAIL. However, it's always nice seeing a reef tank with 1-year worth of growth/changes. Honestly, you won't recognize anything in the tank or under the tank. So a little back story before I jump to the current status of my tank.
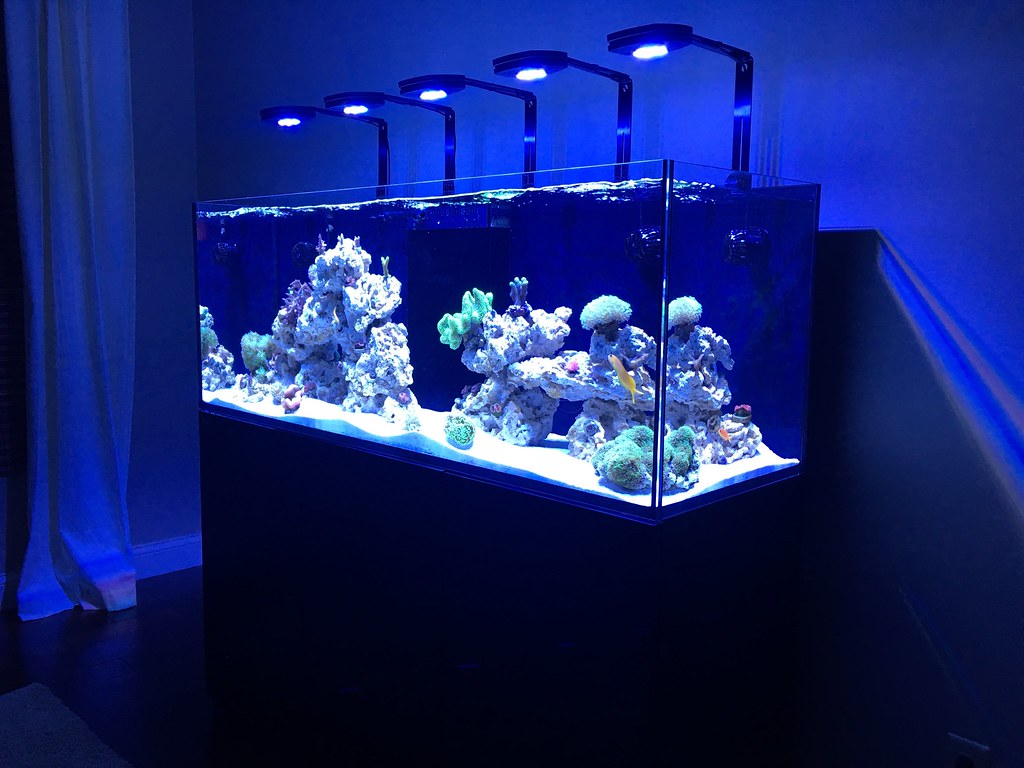
To start off with, I ditched all of the rock and sand in Janurary of 2016. When I did my original aquascape, I used rock that I aquired from a friend. The pieces weren't ideal, but I used hydraulic cement to make structures that I was happy with... bonding smaller rocks together to make larger ones, making overhangs etc. Everything was fine for the first three months. I then noticed a couple of the cemented joints starting to "break" down. The cement was getting soft and starting to deteriorate. The small dark grey parts of the cement were flaking away and making the sand in the area look bad. Luckily, the "infected" areas were not really structural ones so I didn't worry about it too much. The areas where I really needed the support were still solid and completely intact. Then a month later, those areas started to also break down. Now the sand really looked bad and I was going to be facing a landslide of reef rock before too long. On top of that, I was never happy with the sand. To start off, it was REALLY dusty. It also wasn't consistent. It had larger chunks of stuff that would color up with surface algae and then look really out of place in the sand. So being completely fed up, I ordered up 100 lbs or Marco Rocks and Tropic Eden Miniflakes. In the past, I used Marco Rocks in my nano and was 100% happy with them.
I put all of my coral in my sump and performed a 24 hour swap. First getting the rock out and then the messy job of getting the sand out... without removing any of the water. Here it is with everything out:
 IMG_5122 by Toby Broadfield, on Flickr
I think I clogged up about 20 filter socks throughout this process lol. It was very late at this point so I let the tank clear up over night and then I continued on with it when I got home from work the next day. I did my aquascaping with the new Marco Rocks. Since they sent me a nice variety of large pieces, I didn't have to bond anything together to get the look I was after. Next up was the Tropic Eden sand. Let me tell you, this stuff is basically dust free... it's unbelievable! Then I simply moved the corals back into the DT and I was good to go. I used a bottle of Dr. Tim's All-In-One to make sure I didn't have a crazy cycle. All parameters tested great every day. I had a very minor, 1 week long diatom bloom. And that was it. I have had great results with Dr. Tim's in the past and the results were equally impressive this time around. Back in business:
 IMG_5285 by Toby Broadfield, on Flickr
 IMG_5307 by Toby Broadfield, on Flickr
To start off with, I ditched all of the rock and sand in Janurary of 2016. When I did my original aquascape, I used rock that I aquired from a friend. The pieces weren't ideal, but I used hydraulic cement to make structures that I was happy with... bonding smaller rocks together to make larger ones, making overhangs etc. Everything was fine for the first three months. I then noticed a couple of the cemented joints starting to "break" down. The cement was getting soft and starting to deteriorate. The small dark grey parts of the cement were flaking away and making the sand in the area look bad. Luckily, the "infected" areas were not really structural ones so I didn't worry about it too much. The areas where I really needed the support were still solid and completely intact. Then a month later, those areas started to also break down. Now the sand really looked bad and I was going to be facing a landslide of reef rock before too long. On top of that, I was never happy with the sand. To start off, it was REALLY dusty. It also wasn't consistent. It had larger chunks of stuff that would color up with surface algae and then look really out of place in the sand. So being completely fed up, I ordered up 100 lbs or Marco Rocks and Tropic Eden Miniflakes. In the past, I used Marco Rocks in my nano and was 100% happy with them.
I put all of my coral in my sump and performed a 24 hour swap. First getting the rock out and then the messy job of getting the sand out... without removing any of the water. Here it is with everything out:
IMG_5122 by Toby Broadfield, on FlickrI think I clogged up about 20 filter socks throughout this process lol. It was very late at this point so I let the tank clear up over night and then I continued on with it when I got home from work the next day. I did my aquascaping with the new Marco Rocks. Since they sent me a nice variety of large pieces, I didn't have to bond anything together to get the look I was after. Next up was the Tropic Eden sand. Let me tell you, this stuff is basically dust free... it's unbelievable! Then I simply moved the corals back into the DT and I was good to go. I used a bottle of Dr. Tim's All-In-One to make sure I didn't have a crazy cycle. All parameters tested great every day. I had a very minor, 1 week long diatom bloom. And that was it. I have had great results with Dr. Tim's in the past and the results were equally impressive this time around. Back in business:
IMG_5285 by Toby Broadfield, on FlickrIMG_5307 by Toby Broadfield, on FlickrBroadfield
New member
This is a more current FTS from about 3 months ago. I removed about 20% of the rock for a more minimalistic look. I also removed the black film from the back wall. I feel like it gives the appearance of more depth... kind of like you are looking out past a coral reef in the ocean and looking into the abyss. I about forgot to mention that I changed out the lighting for a Giesemann Aurora T5/LED hybrid.
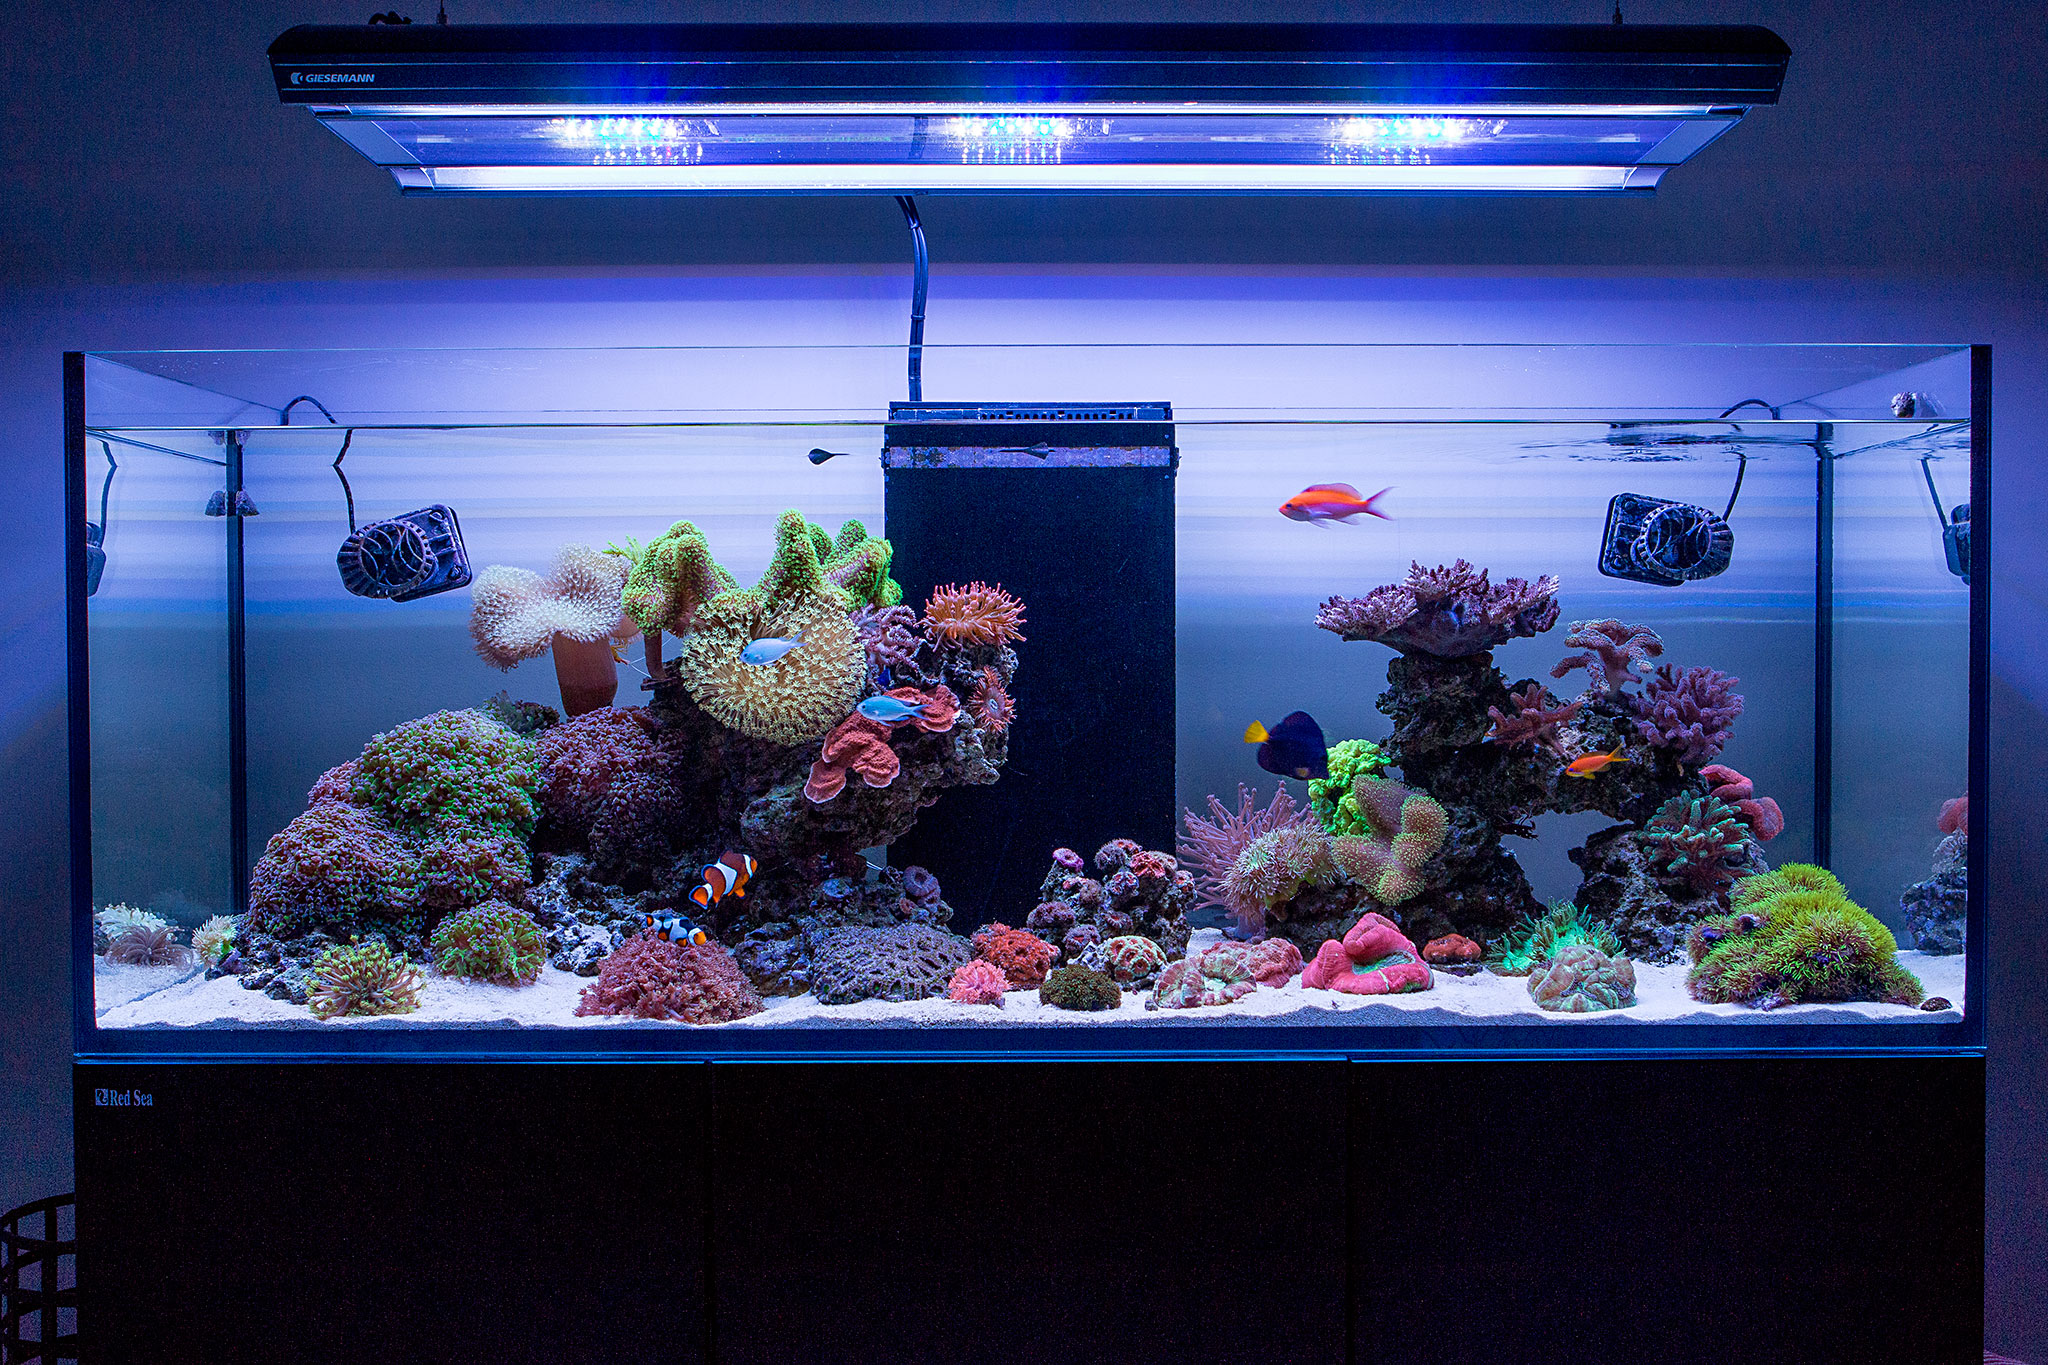 IMG_4278 by Toby Broadfield, on Flickr
IMG_4278 by Toby Broadfield, on Flickrxj_matt
Premium member
This is a more current FTS from about 3 months ago. I removed about 20% of the rock for a more minimalistic look. I also removed the black film from the back wall. I feel like it gives the appearance of more depth... kind of like you are looking out past a coral reef in the ocean and looking into the abyss. I about forgot to mention that I changed out the lighting for a Giesemann Aurora T5/LED hybrid.
Wow this is a beautiful tank keep up the work!!!!
Broadfield
New member
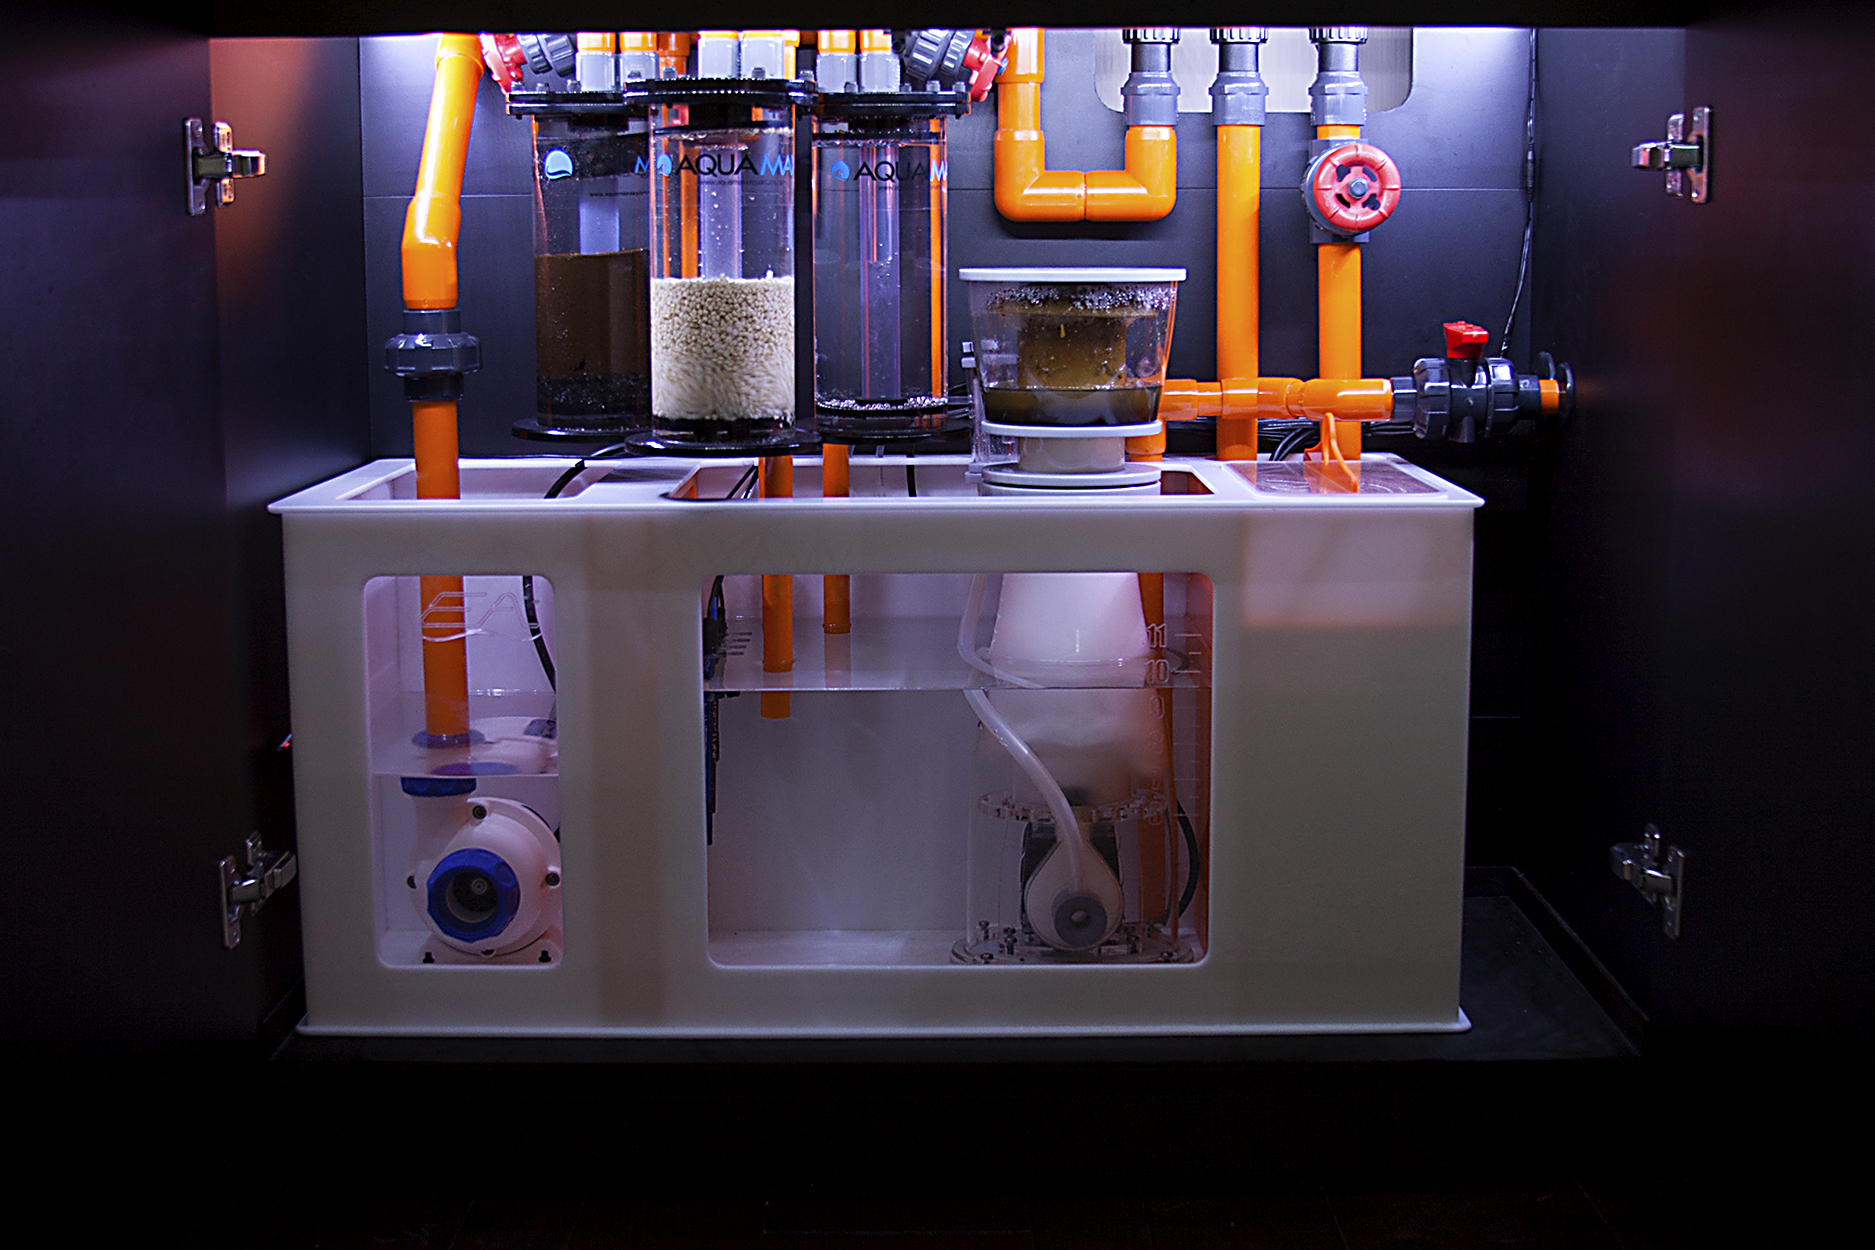
My original control center was just a quick/temporary solution until I had more time to do what I really wanted to in that area of the stand. I also knew that I would be swapping out the sump at some point and also get away from the Red Sea valve and piping. I decided I would kind of match the theme from the sump/plumbing and into the control center area. So I started with a modified Elite Aquatics sump, orange piping and added a 3rd reactor if I ever need to run carbon for any reason.
I yanked the old sump out about 5 weeks ago...
Before:
 IMG_5972 by Toby Broadfield, on Flickr
During:
 IMG_7676 by Toby Broadfield, on Flickr
After:
 IMG_7088 by Toby Broadfield, on Flickr
 IMG_7770 by Toby Broadfield, on Flickr
 IMG_7661 by Toby Broadfield, on Flickr
 IMG_7613 by Toby Broadfield, on Flickr
I yanked the old sump out about 5 weeks ago...
Before:
IMG_5972 by Toby Broadfield, on FlickrDuring:
IMG_7676 by Toby Broadfield, on FlickrAfter:
IMG_7088 by Toby Broadfield, on FlickrIMG_7770 by Toby Broadfield, on FlickrIMG_7661 by Toby Broadfield, on FlickrIMG_7613 by Toby Broadfield, on Flickrjrpark22000
Premium member
Keep the fish porn coming. Wow, great looking tank and livestock
Broadfield
New member
I just finished this a week ago. As mentioned earlier, I wanted to pull in the colors from the sump area, into my control center. I kept with same overall base design where the electronics are mounted. The hinged middle panel worked great to simply raise it to a horizontal position and lock it into place. This allowed access to all of the power items behind it. But I wanted to get away from the black colored base boards and do white acrylic. For one, it matches the sump and it also makes the modules stand out more. So in the picture below, the upper panel is fixed. Then the lower panel is hinged to it and folds up to a hinged position. The DDR container simply slides out and can be set off to the side... I left extra length on the dosing lines and cabling to do so. I then have full access to the rest of the power items, EB8 etc. I embedded strong magnets into the white base panels and into the back side of the beauty panels. So the beauty panels lock into place really nice. All of the different illumination is controlled through my Apex... which means I can simply control the different illumination zones through my p
 IMG_8001 by Toby Broadfield, on Flickr
 IMG_7102 by Toby Broadfield, on Flickr
 IMG_7108 by Toby Broadfield, on Flickr
 IMG_8018 by Toby Broadfield, on Flickr
 IMG_7989 by Toby Broadfield, on Flickr
 IMG_7984 by Toby Broadfield, on Flickr
 IMG_8019 by Toby Broadfield, on Flickr
IMG_8001 by Toby Broadfield, on FlickrIMG_7102 by Toby Broadfield, on FlickrIMG_7108 by Toby Broadfield, on FlickrIMG_8018 by Toby Broadfield, on FlickrIMG_7989 by Toby Broadfield, on FlickrIMG_7984 by Toby Broadfield, on FlickrIMG_8019 by Toby Broadfield, on Flickr
Last edited:
r33fswagg3r
Premium member
Broadfield, awesome job man! I have been working on a similar color combo for a customer and I have to say, great choice. Nice to see something other than red in a sump area that most people typically do. Truly inspiring where form meets function.
sk8elenex92
Premium member
Wow that sump setup is amazing. Great freaking job.
Rcunning8
Premium member
Omg I'm freaking out!! This is so amazing! First amazing tank! But How did you build a stand like that? Did it come with those compartments for the controllers and then u just added in the acrylic and lighting yourself? If so what kind of stand is this? I was under the impression the tank and stand were by Red Sea but didn't know Red Sea came with compartments like that!! So amazing dude u are making me stir crazy and wanting to rip everything I have built apart lol. I'm gonna have to wait though until my next tank to do something even remotely as cool as this!
Sent from my iPhone using Tapatalk
Sent from my iPhone using Tapatalk
Broadfield
New member
Omg I'm freaking out!! This is so amazing! First amazing tank! But How did you build a stand like that? Did it come with those compartments for the controllers and then u just added in the acrylic and lighting yourself? If so what kind of stand is this? I was under the impression the tank and stand were by Red Sea but didn't know Red Sea came with compartments like that!! So amazing dude u are making me stir crazy and wanting to rip everything I have built apart lol. I'm gonna have to wait though until my next tank to do something even remotely as cool as this!
Sent from my iPhone using Tapatalk
The stand is indeed the OEM Red Sea stand that comes with the Reefer 450. The section behind the two left doors is the sump section. Then the section behind the right door is intended for a chiller. So it's just one large open cavity. Everything you see in there was fabricated by me... probably about 35 hours of work.